A look back at our gone, but not forgotten, 1993 Lada Niva Project, originally published on 3 February 2013
The 1993 Lada Niva – Part 9 Свободный транспорт (Loose Mounts)
On December 29th we decided to head back out into the wilderness and bash around, rather than installing the new parts from Lada World, and this time we took Andrew and Robb out who followed in the SVT Raptor. Driving along, the Lada performed very well, able to climb the rolling hills and maintain the 100 kph speed limit with ease. Once we hit the trail head it became pretty clear that the pathways were much too narrow to run the wide Raptor without serious paint damage, so we parked it and everyone loaded up in the Lada.

We toured around the fresh snow and made it further than before, but the deep snow and extra load made for hard going, and we retreated and took a break back at the normal bivy site. We had gotten the engine pretty warm, but everything held, the overflow coolant bubbling like a witch’s brew in the degas bottle.
After enjoying a nice fire and a hot beverage, we mounted back up and prepared to roll out for home. Soon after we got under way, we noticed the Lada wasn’t acting quite right, it refused to idle and the air-to-fuel ratio was excessively lean, even at idle. Driving, it lacked the power to cruise properly and stalled out when approaching stop signs and bump restarting with the clutch was necessary to keep it alive. Shawn began to wonder if the mixture screw had come out of adjustment, and once we pulled home and checked it, he was more than right. Our mixture screw had not only come out of adjustment, it had fallen out of the carburetor and was lost forever.
To fix this, we visited the junkyards later in the week searching for an old Volkswagen with a similar carb to harvest parts from. We had very little luck locating any carbureted vehicles so we had to settled for two options, one from a Ford Motorcraft 4-barrel, (needle style) and another from a Toyota 20R 2-barrel (blunt style). Back at the shop both of these screws fit in carb, and were even in the right thread, but it wouldn’t be quite that simple. The Ford screw allowed the engine to idle correctly but when adjusted to 14.7 AFR we only had one or two threads engaging the carb body, it would surely vibrate loose and be lost, just like the original, we moved on to trying the Toyota one.
This one bottomed out with making any impact to the overall idle mixture, so Shawn figured we could profile a “needle” into this blunt ended bolt and maybe have something workable. I remembered a method I had used in place of a lathe for crudely turning down sockets to fit in tight areas and set up a similar rig. The angle grinder was flipped onto its back and clamped in the vise, the bolt was chucked up in an electric drill, and from there each of us ran a power tool. With each spinning in the same direction it was a simple matter of picking the angle of the cut, 15 seconds later we had a nice fine cut needle.
Tested on an idling engine it worked perfectly, small adjustments allowed progressive changes to the idle mixture and soon it was pegged at 14.7 and behaved very well, all of the previous hesitation and bogging had vanished, the retention spring ensured this one was unlikely to fall out.
 After a positive road test we sized up the next project, installing the Lada World supplied Layshaft and donut flex coupler.
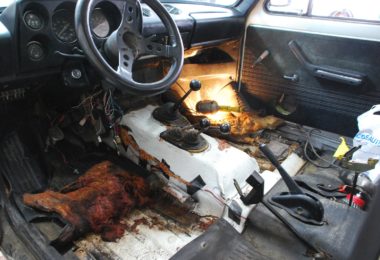
The night of January 11th, 2013 we began work on what would serve to be the most involved Lada project to date, starting with the inspection and assessment of the differential. As you may recall we had serious issues with the center differential thrashing about under load and we had been able to confirm that the layshaft was indeed striking parts of the body, once we removed the center diff mounts and interior, the problem became very obvious.
The floor had been heavily over the years and had cracked where the passenger side center diff mount was located, and judging by the severity of the damage, we were in for some reconstructive work.

The original floorpan is very thin 18 gauge metal, with a studded backing plate of similar thickness that was spot welded to the floor for hanging the differential. On top of all this rode the front seat mount, a lot of load on a small area which clearly wasn’t up to the task. We built a rough list of materials, sheet metal, 1/8” thick plate, rust convertor paint and spray in rubber bed liner for sealing the floor.
Later the next day we had all of the materials in hand and set to work, Shawn expertly repairing the torn floor, then a large patch was made with a number of holes for plug welding to the transmission tunnel. Once anchored, the reinforcing patch was heated with a torch and hammered to match the contour of the transmission tunnel, and then plug welded and allowed to cool. This gave us a very strong patch with a very crude from of heat treating. The new center differential mount was made from a much larger piece of 1/8” plate with was placed on the fresh patch, stitch welded securely. Two holes were drilled from the underside to locate the new mounting studs, which were made by simply dropping two correctly sized bolts in from the top and welding the heads to capture them.
Finally the seat mount was placed back on top and it too was welded into its original spot. The driver’s side seat mount received a similar treatment as it too was damaged, but not to the point of the passenger side. A coat of rust preventative paint sealed the metal from any corrosion while the spray in rubber bedliner was used to glue the underlay into place.
The photos tell the tale:

Original mounting plate shown, not for reuse.


With the center differential mount problem solved, it was a very quick matter to install the new CV layshaft and the upgraded guibo isolator. Inspection of the old parts found the universal jointed layshaft in good condition, but the rubber donut isolator was certainly shot, it had many deep cracks that ran 1/3 of the way or more through the material.


Better than new! Note: Remove the steel band before driving or with will fly off on the road.
With everything back together it was time for a road test, and after a slight center differential alignment adjusted the Lada was again better than ever before. The driveline shake was gone and power delivery to the wheels was much smoother overall.
Soon it would be time for another off-road test!